Behind The Scenes · Children's Parties · Decorations · Party Shop

Personalised Children’s Party Stationery

kidstagsnew1

Hello! It’s been a good day so far today. The sun is finally shining in Somerset (after what feels like weeks of rain) and I’ve just launched a new product. I love designing stationery, particularly Children’s stationery as I feel it allows me to be extra playful with my designs. All of my designs derive from hand drawing, later to be skilfully manipulated on the computer, printed, photographed and listed on my two online shops (Etsy and Notonthehighstreet). There is only one person employed at Rosefinch Studio (good old me), meaning it can often take some time for new products to be launched.

kidstagsnew2

These ‘Personalised Children’s Party Bag Thank You Tags’ may just be one of my most favourite products yet, I just love how pretty they are. If you’re wondering what their exact purpose is, let me explain. Typically at children’s parties, theres a tradition of giving party bags to their friends as a thank you (and for transporting left over birthday cake in of course). I thought it’d be really lovely to offer personalised gift tags complete with twine for adorning such party bags.

kidstagsnew3kidstagsnew4

My party bag tags can be personalised which definitely adds a unique touch. The large number at the top of the tag represents the child’s age. There’s a sweet message underneath that (which can also be personalised), thanking their friend for celebrating their birthday party with them, followed by a ‘from’, allowing the birthday child to include their name. Each tag comes complete with twine, available in a variety of colours.

kidstagsnew5

As you can see, the tags are very floral. The hearts and polkadots look very pretty surrounding the flowers and the bird seen perching on the flower cluster finishes the design off I think. My next plan is to extend my range of gift tags as I really enjoyed designing and producing these. You just don’t seem to see anything of this kind in mainstream shops, which to me, makes it very desirable as I love unique products.

What are your thoughts? I’d love to hear from you! Do you have a party coming up? If so, happy party planning and feel free to have a browse in my Etsy and Notonthehighstreet shops for personalised party products.

Decorations · DIY Party Crafts · Party Recipes · Weddings

DIY (No Sew) Cake Bunting Tutorial

cake1cake9

Hello! In this post I’m going to show you how to make this delightful cake bunting you see here, with an easy to follow tutorial. If you have a special occasion coming up such as a birthday, wedding, christening, anniversary etc then this is perfect for you!

As you may have guessed from the above photographs, my Mother-in-law held a 60th birthday party over the weekend and I offered to bake her a cake. I was so happy when she accepted my offer, even more so when she told me she didn’t have anything specific in mind. This allowed me to have complete creative control which is perfect for me.

cake7

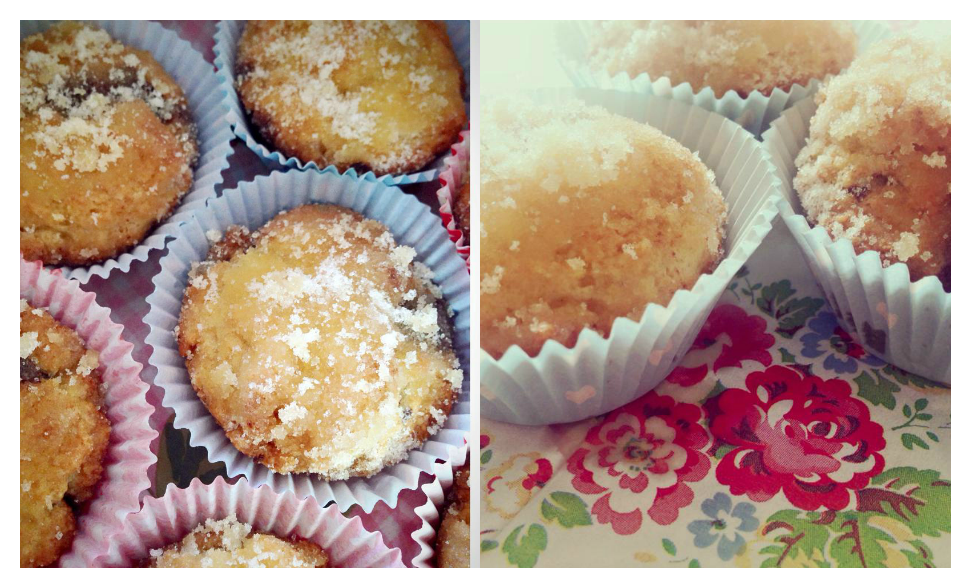
After spending weeks on Pinterest, I was feeling completely inspired (if not a little overwhelmed at the options) and I finally drew up a plan of what I wanted to do. As you can see from the pictures, I chose a simple vanilla layer cake with buttercream. I used a Primrose Bakery recipe from their first book, ‘Cupcakes from the Primrose Bakery’ and can thoroughly recommend all of their books for reliable recipes. I also made some vanilla biscuits from ‘The Biscuiteers, Book of Iced Biscuits’ recipe book, which I can also thoroughly recommend if like myself, you have limited experience of making biscuits.

I decided to get creative with the biscuit recipe and add a fondant topping which the Biscuiteers recipe book does not cover. I purchased a set of inexpensive letter/number biscuit stamps from Amazon alongside some complimenting sugarcraft decorations for the cake and the biscuits.

final-stepcake5

Due to the amount of detail in the cake and biscuits, I opted for some simple fabric cake bunting in complimentary colours, which I am going to show you how to make here. I have a sewing machine, but I will openly admit I am not a huge fan of sewing. If you feel the same (I hear you), then this no sew fabric cake bunting is perfect for you.

To make this DIY No Sew Cake Bunting you’ll need the following materials:

  • Fabric of your choice (I used patterned cotton from a Hobbycraft fat quarter bundle)
  • Bondaweb (This is a web adhesive on paper, usually sold by the metre – widely available online or from most craft shops)
  • An Iron and Ironing Board
  • Fabric and Paper Scissors
  • Twine or Sewing Thread
  • 2 x White Cake Pop Sticks (you can also use bamboo skewers or paper drinking straws)
  • Pencil, Ruler and Eraser
  • 1 x Piece of Paper or Card

To begin with, turn your iron on and decide which fabrics you intend on using. I opted for 7 triangles in 5 different colourways but you may decide to do this differently.

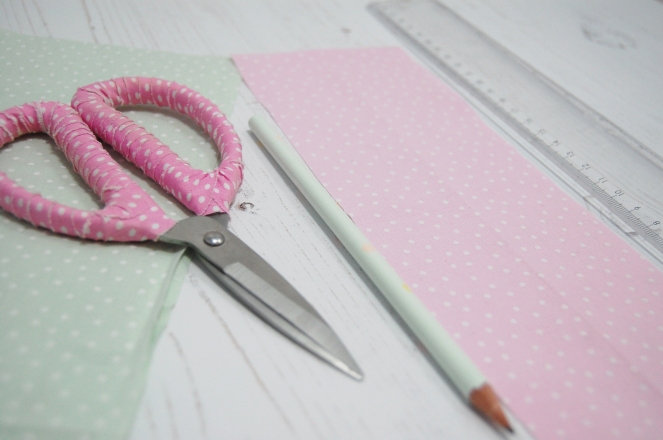
Turn your fabric onto the wrong side (the side not containing the pattern) and with your ruler and pencil, you’ll measure and mark off your first strip of fabric. Mine measured (Length) 18 centimetres x (Width) 10 centimetres. (As opposed to using a pencil, you can purchase a specific pen for drawing on fabric which allows any marks made to vanish. However, as the side we are drawing on is not visible, this isn’t necessary).

Once you’ve finished measuring your strips, take your fabric scissors and cut them out so you have something which resembles the pink piece of fabric shown below.

step1

Now the iron should be hot, take your ironing board, fold the strip in half lengthways and iron, until you have something which resembles the pink strip of fabric below. If you have multiple strips, repeat this process for all of them.

step2

Open each strip of fabric. You now need to measure and cut the bondaweb, positioning it textured side down on one side of the fold. You will need one piece of bondaweb per strip of fabric. If you have cut your fabric strips in accordance with the measurements specified above, each strip of bondaweb should measure (Length) 18 centimetres x (Width) 5 centimetres.

step3

Once the bondaweb is positioned, take your iron and iron this onto the fabric. You must ensure you have measured the bondaweb to the exact size and there are no overlaps, otherwise this may leave a sticky residue on your iron, fabric and ironing board etc which will transfer.

step4

Your strips should now resemble the ones shown in the above photograph. Take your paper scissors and cut out a triangular shape out of paper or card. This will be your template for each flag. My triangle measured 4 centimetres (at the widest part) and 4.5 centimetres in length, but they can be cut to any measurement within the size of the fabric strips.

Place the paper triangle template on your first strip of fabric and lightly draw around it. You can use a light coloured pencil to do this or a vanishing/air soluble fabric pen. Repeat the process until you have marked out all of your triangles on each strip of fabric. You can then begin cutting out your triangles which should resemble the ones shown above. (p.s the bunting is easier to assemble if the widest part of the triangle is positioned and cut on the fold of the fabric).

step6

Once you’ve cut out all of your triangles, position them into the order you’d like them to be. Take your twine or string and cut to the width you’d like your bunting to be, ensuring you’ve left approximately 10 centimetres on each side for tying the bunting on to the sticks.

Once you’ve cut your thread or twine to size, take a darning needle and thread the twine/thread through each triangle one at a time. You can easily reposition the triangles during this stage if they are a little close together, so don’t worry. Once they are positioned how you’d like them, tie each end of the bunting onto your sticks – you can just tie a small knot around the end of each cake pop stick and this will be substantial. Any excess thread/twine can be cut off. I like to have some hanging down at each end but this is personal preference.

cake3

Voila! You’re now done and you can proudly position it on your cake! I hope your cake bunting looks beautiful. I’d love to see your creation, so feel free to post it here as a comment or hit the ‘hello’ button above to send me a photograph of it via email. Happy baking/crafting!

Children's Parties · Party Recipes

How to Make the Perfect Cupcakes

I’ve been baking for a good number of years now, and my love for cake decorating is still very strong. Whenever I have friends or family visiting or a party to prepare for, I always turn to my cupcake recipes for some inspiration. With so many recipes, tips and ideas out there, it’s very easy to get lost whilst planning. To help you to avoid this, I’ve put together my top ten baking tips, alongside some adorable styling ideas and a tried and tested vanilla cupcake recipe, so you can enjoy a stress free baking session in the kitchen. If the cupcakes pictured below look like just your cup of tea, then read on!

cupcakes2

1. Use the best ingredients you can afford

2. Bring the ingredients to room temperature before using them

3. Don’t over mix the batter

4. Try to be as precise as possible with weighing or measuring

5. Always sift the flour and baking powder to avoid lumps

6. Use an electric hand mixer where possible, mainly for consistency and time

7. Use the appropriate sized cases for your muffin tray and recipe

8. Ensure the oven temperature and cooking times are accurate

9. Do not open the oven door whilst baking. Even a small amount of cold air will cause the sponge to sink

10. Before icing, allow the cupcakes to cool completely, and do not refrigerate them

cupcakes1 cupcakes3

Vanilla Cupcake Recipe:

Makes 12 regular cupcakes

Ingredients:

110g unsalted butter, at room temperature

225g golden caster sugar

2 large free range or organic eggs

150g self raising flour, sifted

125g plain flour, sifted

120ml semi skimmed milk, at room temperature

1 teaspoon good quality vanilla extract

Method:

Preheat the oven to 160c (fan)/180c/350F/Gas mark 4 and line a 12-hole muffin tray with cupcake cases.

Cream the sugar and butter to a pale consistency. Add the eggs, one at a time, and mix for a minute or so after each one is added.

Combine the sifted flowers into the same bowl. Measure the milk and add the vanilla extract to it.

Gradually fold the flours into the creamed mixture, using a large metal spoon. Add the milk.

Carefully spoon the mixture into the cupcake cases. An ice cream scoop or measuring scales will help you to achieve an even amount of batter into each case, meaning the cupcakes should be of equal size and baked consistently.

Bake in the oven for 20-25 minutes, or until fully cooked. Insert a skewer into the middle of the cupcakes when baked. If they are cooked through, it should come out clean.

Leave them in the tin for about 10 minutes before placing on a wire rack to fully cool. Once they are completely cooled, you can ice them using my delicious vanilla buttercream recipe below.

Vanilla Buttercream Icing

Ingredients:

110g unsalted butter at room temperature

60ml semi skimmed milk at room temperature

1 teaspoon good quality vanilla extract

500g icing sugar, sifted

Method:

Beat the butter, vanilla extract, milk and half of the icing sugar until smooth. This can take up to 5 minutes. Gradually add the remaining icing sugar until your buttercream is smooth and creamy. There are several ways to decorate cupcakes with buttercream icing. To achieve a finish similar to the cupcakes pictured above, you will need to invest in a piping bag and large nozzle. If you don’t have those tools, you can alternatively spread the icing on top of the cupcakes with a pallet knife. Top with cake decorations of your choice and serve with pride! Enjoy!

A polite reminder: This tutorial is for personal use only and should not be reproduced or sold. 

Children's Parties · Decorations · DIY Party Crafts

Paper Heart Cupcake Toppers Tutorial

Cupcake toppers can be purchased pretty much anywhere now, but can sometimes become an unnecessary expense, particularly if you have a large number of cupcakes to decorate. Cupcake toppers can easily be made at home to suit any party theme, and only require a few relatively cheap materials. You’ll be pleased to know that you should be able to find most, if not all of these materials in your local supermarket and craft store. If you have any cake to hand, go and find yourself a beautiful plate, some pretty napkins and make yourself a tea. All of which are the perfect accompaniments to any craft project of course.

Materials: 

Decorative Paper/Wrapping Paper

Double Sided Selotape

Large Heart Paper Cutter

Small Cocktail Sticks

Paper Scissors

Method: 

4

1. First of all, decide on how many cupcake toppers you require. For 12 cupcake toppers, you will require 24 paper hearts, to ensure the hearts are all double sided. Take your paper cutter and cut out all of your hearts, placing them in pairs. There is a very wide selection of paper cutters, available in most craft stores. They come in all shapes and sizes, so you can definitely adjust the tutorial to your taste and theme.

1

2. Take a pair of sharp scissors and cut 3 strips of double sided selotape for your first cupcake topper. The reverse side of 12 of your paper hearts will contain 3 strips of double sided selotape. There will be one long strip in the centre of the heart, which the cocktail stick will be placed on top of, and 2 smaller strips either side of that, to stick the paper hearts together. Repeat this process for half of your paper hearts.

2

3. You should now have 24 paper hearts. The reverse side of 12 of them should contain double sided selotape and a cocktail stick, and the other 12 paper hearts should be plain. These plain paper hearts can now be placed on top of those with cocktail sticks, ensuring the pattern is visible on both sides of the cupcake topper. You should now have something beautiful which looks like this.

3

When finished, they will definitely impress your guests and give any dessert table that extra special touch! Enjoy!

A polite reminder: This tutorial is for personal use only and should not be reproduced or sold. 

Children's Parties · Party Recipes

Malteser Chocolate Cake Recipe

chocolate-cakemalteser-cake

We welcomed family into our home for dinner today, and I decided that it was the perfect opportunity for some chocolate cake recipe testing! I absolutely love chocolate cake, and think it’s the perfect kind of cake for any special social gathering or party. It’s simple to make, it’s a crowd pleaser and it is super versatile in the way that it can be modified or decorated to suit different tastes and requirements. Place it on top of a beautiful cake stand, polkadot doily and tablecloth, and you have yourself something absolutely delightful!

Obviously it’s fairly clear that chocolate cake is not groundbreaking stuff, and certainly hasn’t been invented by me (sadly), but there are so many variations of it and so many different recipes out there. My bookshelf is overflowing with baking books, so I’m guessing I probably have about 30 different chocolate cake recipes. Over time, I’ve tried and tested many of them, often sprawling hand drawn notes all over the pages. This recipe has derived from all of those little notes, alongside all of the baking mishaps I’ve suffered along the way to get to this point! (I’ll spare you the details!) If you feel like having a try, or you are baking for a special occasion, pop some music on, grab an apron and some pretty spatulas and have some fun with my recipe.

Ingredients

For the Cake

230g soft butter, plus extra for greasing

230g caster sugar

3 large eggs

180g self raising flour

60g cocoa powder

1 level teaspoon baking powder

For the Filling and Topping

350g icing sugar

80g cocoa powder

100g soft butter

4 tablespoons milk, to mix

To Decorate

Chocolate balls such as maltesers, if you’re looking for something similar to my cake. If not, you can use simple sprinkles or other cake decoration.

You will need:

Two 20cm round sandwich cake tins, greased with butter and lined with baking parchment

Makes 1 medium-large cake (serves 8-10)

Method

1) Pre heat the oven to 180c (gas mark 4)

2) Place the butter and sugar in a mixing bowl. With an electric mix or a wooden spoon, cream them together until they are fluffy and pale. Add the eggs, one at a time, mixing well after each addition. Do not mix for anything over 2 minutes, as the sponge needs to be airy when baked.

3) Measure the cocoa powder, flour and baking powder and sift into the bowl. Fold this in gently, preferably with a large metal spoon, until all of the ingredients are evenly combined.

4) Divide the mixture between your 2 prepared tins. At this point, you may want to use some weighing scales to ensure even dividing. Bake in a pre heated oven for 20-25 minutes, or until fully cooked through. (Inserting a cake tester or knife into the centre of the cake is a good indication on whether it is cooked through. The cake tester/knife should come out completely clean if it is cooked)

5) Leave the cakes to cool in their tins for 10 minutes. After this time, turn them out onto a wire rack and leave to cool completely for approximately 30 minutes or longer. Do not ice the cake until fully cooled, or a baking disaster may strike!

6) Mix all of the filling and topping ingredients (apart from the milk) together in a large bowl and mix until smooth. The milk should be added 1 tablespoon at a time, should the icing need loosening.

7) Spread half of the icing on one layer of the cake, which will make the buttercream centre. Take the remaining cake and place on top of this layer. Carefully spread the remaining icing on the top of the cake. Decorate with maltesers, or other chocolate/sprinkles of your choice.

The cake can be made the day before and will still taste delightful if stored in airtight containers or tins, but if possible, ice on the day of the event for added freshness.

Enjoy!

Children's Parties · Decorations · DIY Party Crafts · Weddings

Wool Felt Ball Garland Tutorial

I just love wool felt ball garlands and thought I would share a quick and easy tutorial with you. If you have a party coming up and you are feeling creative, then you must try making one. They do a wonderful job of transforming party spaces, particularly when used on or near dessert tables or hanging from feature walls.

Felt balls are relatively cheap and readily available online. A quick google search will provide you with plenty of choice, particularly in size and colour. For this tutorial, I used 14, 2cm x 2cm felt balls in a variety of vibrant colours.

If you’re feeling inspired, then go and grab your supplies along with a lovely mug of tea (and some biscuits), quick!

You’ll need:

A selection of Wool Felt Balls (Mine are 100% Wool Felt)

Yarn

Scissors

Tape Measure or Extra Long Ruler

Thick Sharp Needle

felt-balls-1 Screen Shot 2015-04-30 at 10.01.27

Step 1:

Decide which felt balls you intend on using and choose your yarn. The yarn will be used to assemble the garland and will be visible, so choose a complimentary colour. Grab a tape measure and scissors and cut a piece of yarn to your desired garland length. Add approximately 10 centimetres to this length to allow for the hanging loops at each end of the garland. My yarn measured 127 centimetres. Take your needle, and thread the yarn through it like so:

step2

Step 2:

At this point, I position my felt balls in the order I would like them to appear on the garland. Take your first felt ball and carefully thread the needle through the centre of it. If your needle is big and sharp enough, it should easily thread through the felt balls, but may need a little tug! Continue threading each felt ball onto your garland, until each one is attached:

step3

Step 3:

Once all of your felt balls are threaded through the yarn, lay the garland out and position your felt balls exactly where you would like them. (If you’re anything like me, you’ll like to ensure that the felt balls are fairly evenly spaced at this point!) There should be an extra 5 centimetres of yarn at each end of the garland (or more if you’ve accounted for it) to enable you to make 2 equally sized hanging loops. Thread each of the yarn tail ends into the two end felt balls at either side of the garland. Cut the excess yarn, and voila, you have a loop. Your garland should now be looking similar to this:

loop

loop2

I adore the colour yellow. and you’ll see below that I used some beautiful yellow flowers as a cake centrepiece. The great thing about felt ball garlands, is that there are so many colour combinations to choose from. This means they can be made to perfectly suit your party decor. Enjoy, and please share the results if you decide to make a garland.

twitter jpg

A polite reminder: This tutorial is for personal use only and should not be reproduced or sold. 

Children's Parties · Decorations · Themes

Easter Gift Wrapping

EASTER-FOR-WEB EASTER-FOR-WEB1 EASTER-FOR-WEB3

I am so excited to share my Easter gift wrapping with you in preparation for the Easter holiday. It’s such a wonderful time of year for me. I love the lighter evenings, the beautiful flowers and crisp sunny mornings. I also very much enjoy decorating my Easter tree and being able to give friends and family sweet little packages, made with love.

There are so many delicious Easter chocolates out there at the moment, but the packaging is often a little standardised. I like to be unique and prefer my gifts to stand out from the rest. I purchased some little plain cardboard boxes and filled them with sweet treats, ready to be opened with excitement! I then purchased some tissue paper for the outer packaging. The little patterned fabric strips I used, had been hanging around in my craft room for some time and they seemed perfect for these little presents.

I have several large sweet jars left over from our wedding in April last year, which are used for buttons, ribbon, twine and all sorts of wonderfully useful crafty bits! I had a good look through the jar and managed to find the twine, ribbon and buttons which give the presents that extra special finish.

These little presents take no time at all to prepare and make. They would be perfect for party favours, birthday gifts or special treats for any other occasion in need of some mini tokens of love. They do not have to be filled with sweet treats either. You can fill them with toys, crayons, jewellery, tea lights, soap, party games or anything else you can think of.

You’ll notice my rather large bowl of mini eggs. Mini eggs are one of my weaknesses this time of year. They are just far too tasty. As a treat, I like to use them to fill up pretty bowls. The colours are just delightful and they taste wonderful!

Happy Easter crafting, I do hope I have inspired you!

Children's Parties · Party Recipes · Weddings

Sugar Hearts

sugar cubes1 sugar3sugar1

Today at Paper Doily it is all about quintessentially English tea parties. Before I elaborate, you will notice the emptiness of the beautiful cake stand. I’ve been browsing through my cookery books planning special tea party bakes and will be posting more about that shortly, so do keep your eyes peeled for more tea party related posts.

For now, this post is all about the cheerful sugar hearts, pictured above. I think they are a wonderful addition to the table and definitely add a rather unique touch. With Valentines Day approaching they also offer plenty of inspiration.

These sugar shapes are a creative twist on standard sugar lumps, which can sometimes look a little plain. They are extremely easy to make, take very little effort and can be made in advance of any occasion. They can be used in a variety of ways. If you aren’t hosting a tea party, they will be wonderful as small wedding favours with ‘love is sweet’ stickers, placed in little jars or clear wrappers. They also make lovely gifts and can be packaged creatively in a variety of ways to make them look even more special.

If this is something you would like to try, do feel free to use the recipe below. I would love to hear from you if you are intending to or have made them.

You will need:

250g of Granulated Sugar

1 tsp of Water

Small drops of Food Colouring in your desired colours

A silicone chocolate mould or ice cube tray

Instructions:

1. If you are intending to have multiple coloured sugar cubes, take some clean bowls and measure out equal amounts of sugar.

2. Add a few tiny drops of water into each bowl of sugar and mix thoroughly. The mixture should not be too wet, neither should it be too dry. The sugar should form small lumps.

3. Dip a cocktail stick or other small instrument into your desired food colouring pots and mix a small amount of food colouring in with the sugar, stirring thoroughly until each sugar bowl contains your desired colour.

4. Take your mould and fill each shape with sugar. Pat each shape down with a clean spoon to ensure you have an adequate amount of sugar.

5. Leave to set overnight.

6. Carefully place a plate under the mould and press out each sugar heart. They should come out easily.

7. Enjoy!

Party Recipes · Themes

Valentines Day Strawberry Milkshake

milkshake1 milkshake2 milkshake3

It’s that time of year when many of you are thinking about the little tokens of love and appreciation you can share with your loved ones this Valentines Day. I have never thrown any huge Valentines Day celebrations but I do use any excuse to be creative and if my husband benefits from my efforts, then I’m sure he would agree that thats even better!

This Valentines Day Strawberry Milkshake is a wonderful idea if you are looking for something impressive, inexpensive, delicious and easy. It can be styled beautifully in a variety of ways. I have styled it with crocheted hearts and wooden pegs, but the possibilities really are endless. I crafted a heart paper straw in a few seconds to add that extra special touch. Red glitter paper is readily available in many craft stores, along with heart paper cutters. Paper straws are everywhere at the moment and the paper hearts can easily be attached with a small piece of clear sellotape or a small amount of UHU glue. if you aren’t feeling particularly crafty then similar straws are available here at Paper Doily Party Shop.

If I have inspired you to have a try then please do use the recipe below. I would love to hear from you if you decide to make it for yourself as a treat or for a loved one. Here goes..

Valentines Day Strawberry Milkshake Recipe

Makes 2 medium sized milkshakes. Can easily be halved/doubled.

Prep time: 5 minutes

Ingredients:

4 Scoops of Vanilla Ice cream

200g Strawberries roughly sliced

50-100 ml Milk

Whipped Cream

Sprinkles

Method

1. Place the ice cream and strawberries in a blender with half of the milk and pulse until the mixture is smooth. Keep adding milk until you have reached your desired thickness.

2. Pour the milkshake into a medium/tall glass. Leave an adequate gap at the top of the glass for the cream.

3. Squirt some whipped cream on the top, followed by your favourite sprinkles. You could also add fresh strawberries or a chocolate flake. The possibilities are endless!

Enjoy!

Children's Parties · Party Recipes · Themes

Chocolate Doughnut Muffins

I decided to make chocolate doughnut muffins this weekend and I cannot stop thinking about how perfect they would be for an American themed party. After browsing the web for American themed parties I am blown away by the creativity and imagination by party organisers across the globe. It would appear many other people have had similar ideas and have thrown the most incredible parties and weddings under this theme, some of which are handpicked below.

american 1

american 2

baking1

The blues, bright reds and hints of white are the perfect colours for the American theme and are all used in the most effective way possible. The bunting, bakers twine and retro labels, all featured on the Hostess with the Mostess blog add so much to the overall party theme and just look simply perfect. If you are regular reader, you would have already seen my movie party popcorn pops recipe shown above, but I thought they were very appropriate to this post too!

With much excitement, let me share the delectable doughnut muffin recipe with you, pictured above. I think these doughnut muffins would be the perfect addition to any American themed party dessert table.

Chocolate Doughnut Muffin Recipe

Makes 12

Ingredients:

125ml Milk (I used skimmed)

85ml Vegetable Oil

1 Large Egg

1/2 tsp Vanilla Extract

200g Self Raising Flour

100g Caster Sugar

12 small squares of Dark Belgian Cooking Chocolate

100g Unsalted Butter

150g Granulated Sugar

Method

Preheat the oven to 190c (375F, gas mark 5), and oil a muffin tin. You will need a reasonable amount of oil as this will prevent the muffins from sticking to the tin.

Beat together the oil, milk, vanilla extract and egg. Fold this into the flour and caster sugar mixture. This must be done gently to achieve soft muffins and any lumps can be ignored.

Melt the chocolate in a microwavable bowl or in a pan over the hob.

Place a spoonful of the doughnut mixture into each cup, followed by a spoonful of melted chocolate and then another spoonful of the doughnut mixture.

Place in the oven for 20 minutes.

Melt the butter and place the granulated sugar on a large plate.

Turn the muffins out of the tin and dip each entire muffin into the butter followed by a good roll in the granulated sugar.

Leave to cool and enjoy!

The muffins will be fairly greasy from the butter, so you can place them in muffin or large cupcake cases. Not only does it make them prettier, it may save a lot of sticky fingers.

I would love to hear from you if I have inspired you to make them or you are thinking of hosting an American inspired party or wedding!