Articles

Tea, Cake and Frame Loom Weaving

shop_large

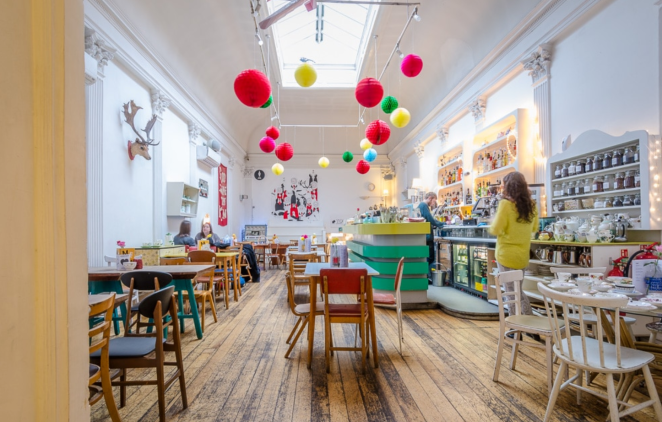
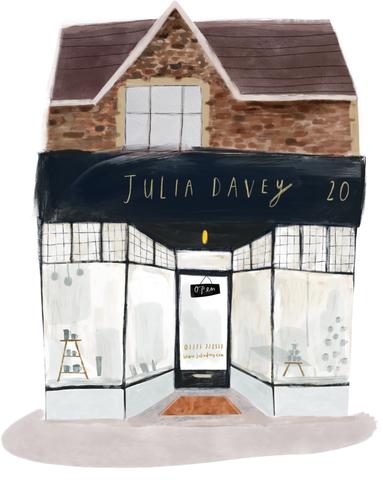
Julia Davey Ceramics is an utterly delightful family business, specialising in fine bone china tableware. Julia’s ceramics take inspiration from her Bath studio, located within the beautiful Somerset countryside. The surrounding woodland creatures and rolling fields strongly influence Julia’s charming collection – all of which can be admired in her ‘bricks and mortar’ shop, in Bear Flat, Bath.

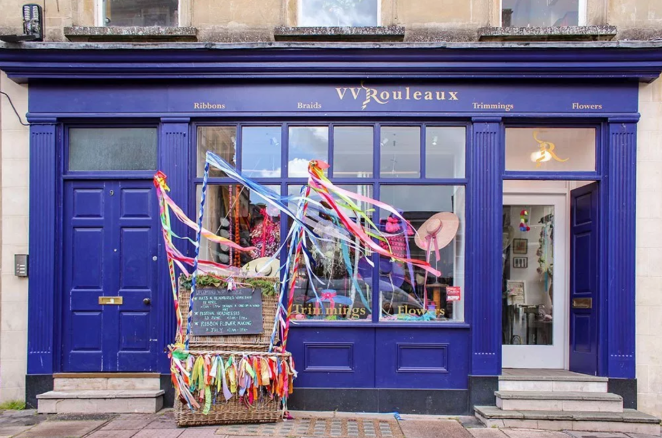
Julia runs a vast selection of creative workshops in her Bath shop. It was here, that textile designer, Ellie Fisher of Elka Textiles – a Winchester based woven textile studio, provided a three-hour introduction into the impressive world of frame loom weaving.

blog1

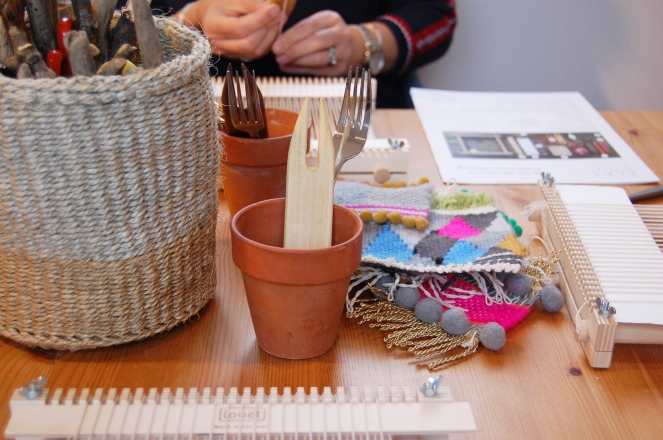
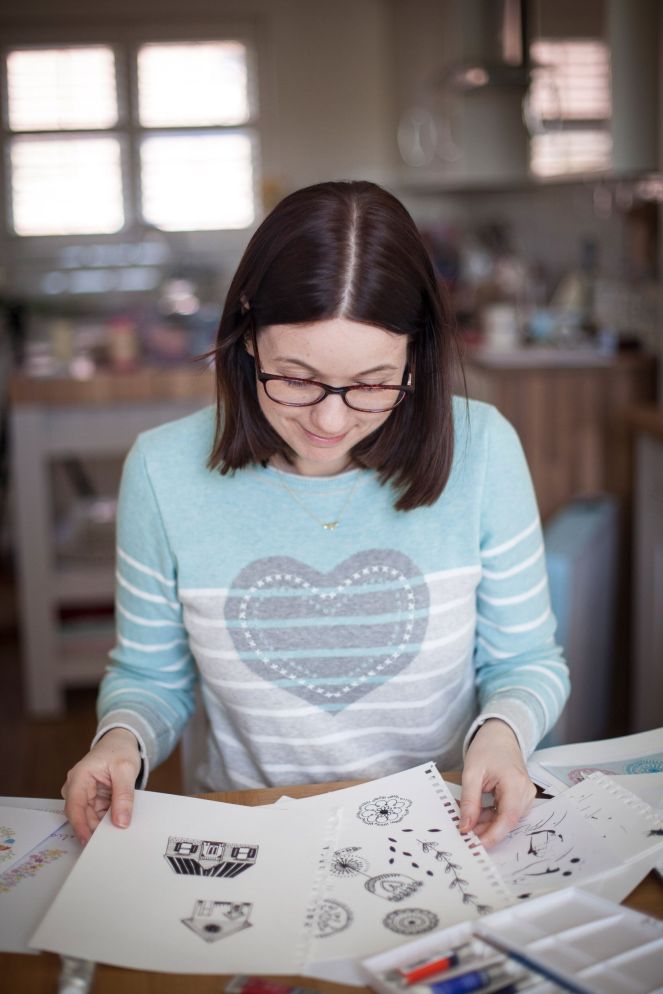
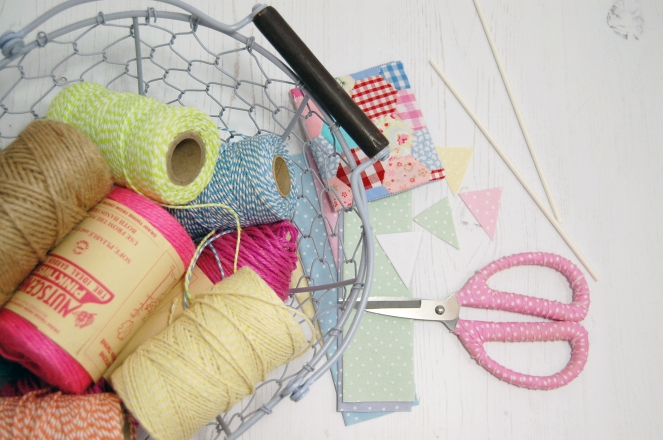
Ellie had thoughtfully laid all of our tools and material onto the work table, ready for our anticipated arrival. Once the ever-so-important tea, coffee and cake orders had been taken, Ellie shared some of her own inspirational work, providing the perfect opportunity for us to muster up some of our own creative ideas.

Raw_vegan_slice_73e33b1e-1ad0-4413-b232-c43ec7f02df8_1024x1024

Screen Shot 2019-06-17 at 16.31.10

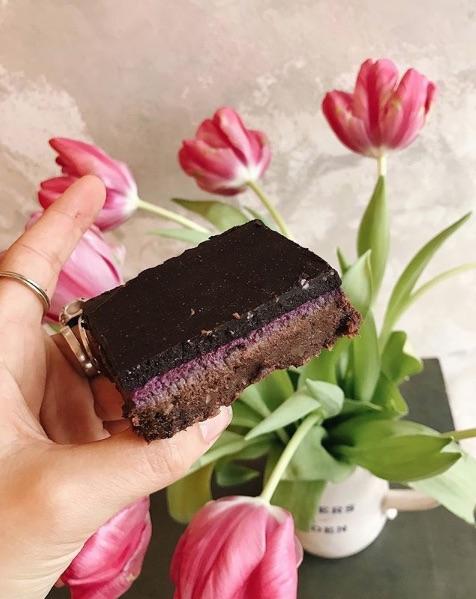
If you’re unfamiliar with weaving terminology, what you see below is a loom. The loom holds the vertical warp threads aligned and under tension, to allow weaving to take place. Whilst enjoying our sweet treats and much needed warm drinks, we were taught how to set this up. I became quite perturbed at this point when noticing a tangle and realising my progress was slower than that of the rest of the group, yet Ellie was on hand to restore calmness – and that she certainly did.

12

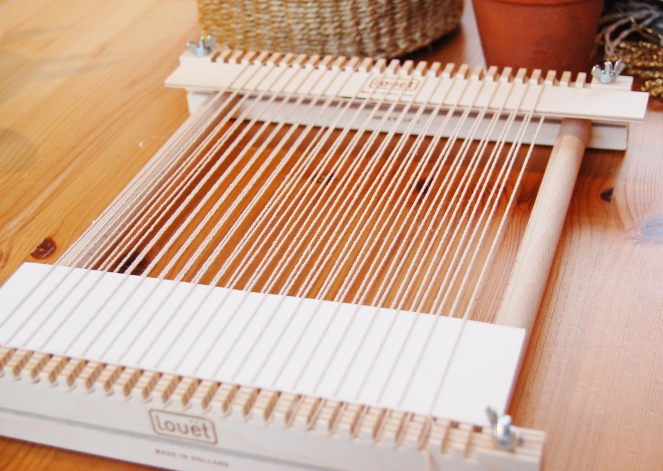
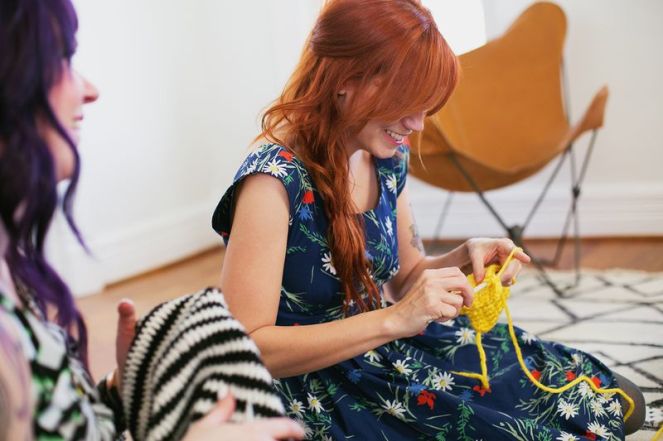
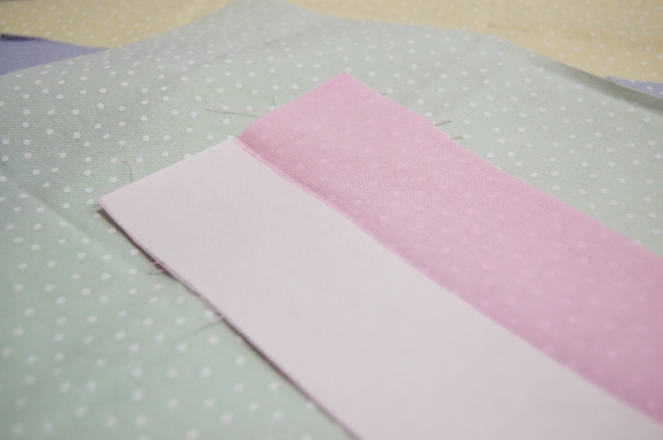
The next stage focused on the weft; the horizontal threads that interlace with the warp. We were introduced to the necessary tools and techniques and began weaving our first few rows with the use of warp yarn – which to you and I, is of a very similar appearance to bakers twine or string.

3

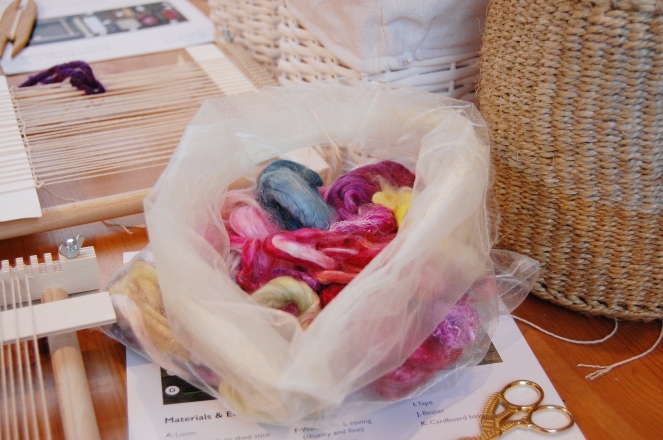
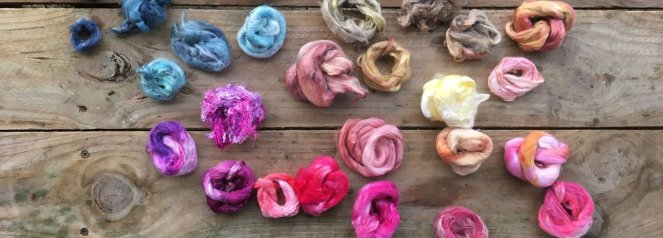
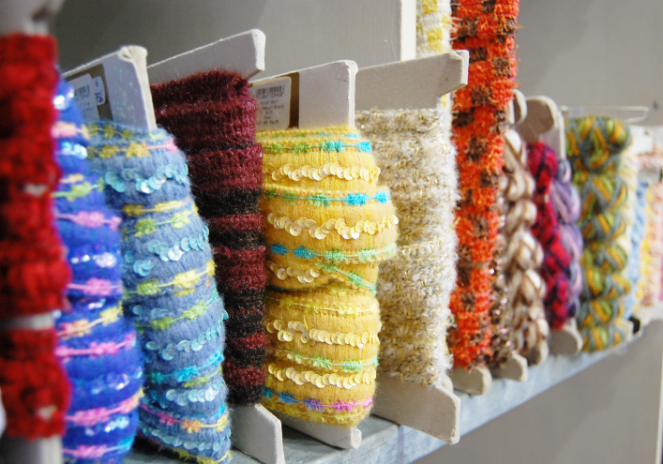
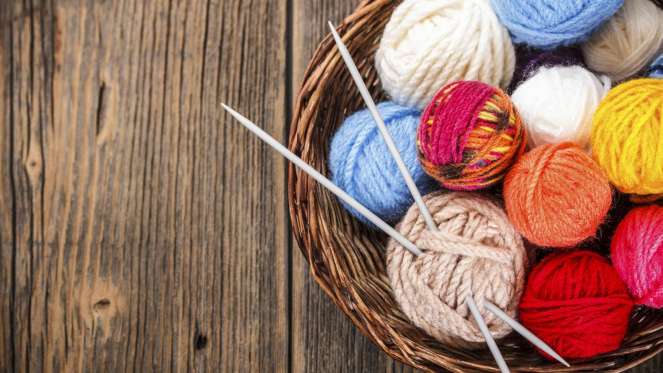
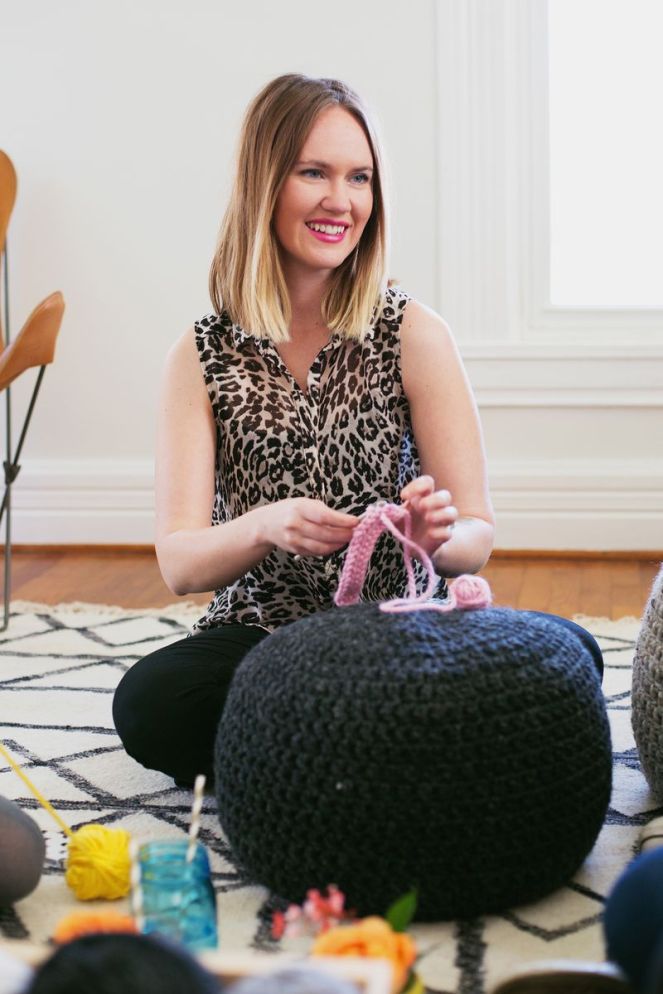
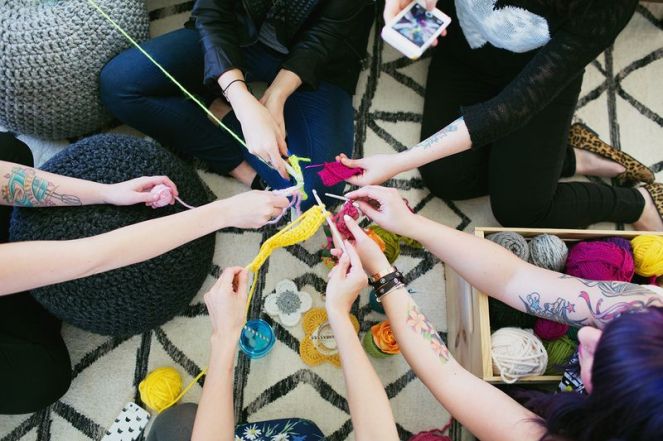
Once complete, the fun could really begin! Ellie’s selection of weft yarns and roving was, without a doubt, sensational, and I was so excited to choose materials and begin the creative weaving process. I felt like an excitable child in a sweet shop as I browsed through the vast selection of yarns and fibres – including organic cotton, bamboo, flax and hemp.

Whilst choosing materials, Ellie brought our attention to some of her naturally dyed and recycled yarns, all available to use on our woven pieces, which I found incredibly kind and inspiring. Sustainability is at the forefront of Ellie’s creative process and business, and it was truly refreshing to hear about her sustainable, cruelty-free, plant-based products.

Screen Shot 2019-06-17 at 15.06.04

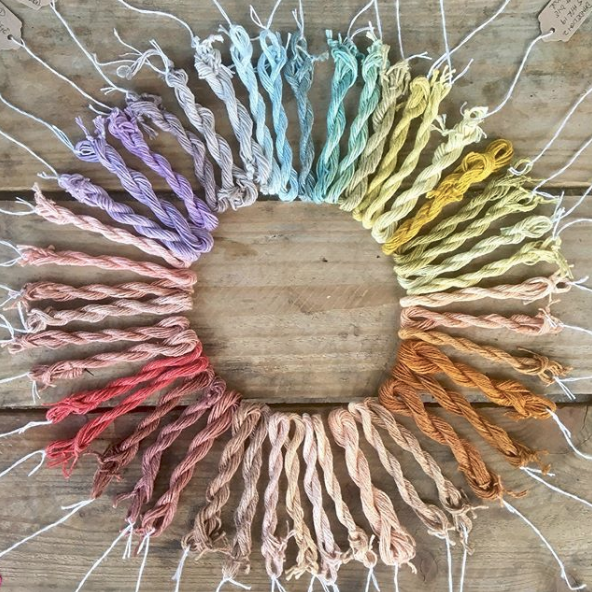
As somebody who is naturally obsessed with colour, this stage of the workshop, without a doubt, suited me down to the ground. Identifying and choosing materials for my weaving, from such a luxuriously wide selection was certainly the most pleasurable part of the morning. This was completely and utterly soothing, and it didn’t take me very long to forget about the technical issues I’d faced previously.

DSC_6027

I can wholeheartedly say that I left the workshop feeling uplifted, relaxed and content, which can sometimes be challenging to achieve. I spent the following afternoon at home working on my woven piece, whilst listening to relaxing music – it felt like such a treat.

Although it’s not considered a perfectly technical weave, the very act of making, experimenting with something new and leaving my comfort zone, allowed me to truly appreciate every single fibre.

I’d thoroughly recommend Ellie Fisher’s weaving courses, and if you happen to be visiting Bath, a trip to Julia Davey is likely to provide a great sense of joy and admiration. Please let me know if you follow my recommendations, I’d love to hear from you.

slide_5

Articles

Breaking the Rules with Embroidery

If you’ve ever set foot in a traditional sewing class or watched The Great British Sewing Bee in any length, you’ll be all too familiar with straight lines, neat curves and clean corners. The manual dexterity earned from years of traditional sewing, is without a doubt, exceptionally valuable. However, free-machine embroidery is here to challenge this completely, asking you to become a rebellious sewist.

A three hour class dedicated to the art of free-machine embroidery, encapsulating all of the creative freedom I could ask for, seemed a perfect way to spend a Saturday. I knew I had to sign up.

Screen Shot 2019-06-11 at 15.38.40

A trip to V V Rouleaux in Bath, aka haberdashery heaven to you and I, provided the perfect opportunity to do just that. 

Screen Shot 2019-06-11 at 15.54.30

Screen Shot 2019-06-08 at 14.57.04

The class itself was held in a perfectly exuberant workroom, adjoined to the haberdashery. All of the tools awaited, as did our lovely workshop facilitator, Poppy.

DSC_5974

vv

After receiving basic, but without a doubt, incredibly useful instructions on how to operate our sewing machines, we stretched calico over our embroidery hoops and began our first practice pieces. The words ‘be careful of your fingers – keep them away from the needle and foot’, and ‘if you ever hurt yourself, seek medical attention,’ may have contributed to a steep blood pressure rise at this point, however, suffice to say, all participants left injury free.

vv1

After a few needle breakages, bobbin adjustments and foot-to-hoop collisions, my confidence grew. I began to find the process of free-machine embroidery highly relaxing, almost meditative. We were given the opportunity of drawing onto the calico with the use of erasable pens prior to stitching, but I quite happily used the sewing needle for mark making throughout this stage.

vv2

After gaining some confidence with the process, the last hour of the workshop focussed on appliqué. This involved cutting shapes from a selection of beautifully patterned fabrics, and free-machining them onto our final piece. After cutting out a variety of shapes, in my case, flowers, we used fusible webbing to fix them on to our fabric.

cf25c63624e9769f4f052621fb6cf237

Towards the end of the session, we were encouraged to collectively place our work on a nearby table. Everyone present was able to produce something charmingly unique, whilst leaving the workshop with a brand new skill.

Often in my day-to-day work when I am illustrating on Adobe software, I’m focussing on small details, ensuring everything has a smooth, immaculate finish, in keeping with my style. The fluidness of free-motion embroidery, contradictory to this rigid working process, made it even more appealing.

I would definitely recommend this course to any local embroidery enthusiasts, like myself, looking to acquire a new skill in a fabulously creative, vibrant setting. Go on, you certainly won’t be disappointed.

Articles

How to Stay Motivated When Running a Small Creative Business

Ozbo6TCz

Are you a small creative business owner working from home, feeling unmotivated? Does this create feelings of guilt, challenging your motivation levels even further? If so, please know that you’re not alone. As a self-employed, small business owner of five years, I too have experienced fluctuating levels of motivation. I’m writing this to let you know that it’s completely normal.

So, what’s causing it exactly? There are many reasons you may be lacking motivation, and this is a crucial question to ask yourself. Allowing yourself to be mindful of the underlying causes can be extremely beneficial. I appreciate this can be tremendously difficult, and like myself in the past, you may have been deliberately avoiding this question entirely.

XzsRLDpv

When I first became self-employed, my motivation was incredibly high. I had been planning to leave my full time job for some time, and my to-do-list was brimming with tasks, of which I was enormously excited to complete.

It was all going so well, for quite a reasonable length of time I may add, until the procrastination presented itself. I suddenly became Marie Kondo’s greatest fan. Thanks to the KonMari method, my wardrobe had never been so impeccably presented. The dishwasher had never looked so clean, and the kitchen drawers were organised to a whole new level. That Victoria sponge cake just needed to be baked, but first, the oven needed to be cleaned again, for the tenth time. I’m fairly sure you can see where I’m going with this. 

Throughout this time, my business was about to become neglected, and I knew I desperately needed to reinstate the strong level of purpose I had once established. This was, and still is, an ongoing process. The advice below certainly isn’t a one-size-fits-all approach, and I’m certainly no expert. However, as a current small creative business owner, having faced similar issues to yourself, I’ve learnt a few things along the way which may help you.

T4fOABSF

Create a Regular Routine

You know it, distractions are everywhere. I’m partial to an episode of ‘Homes Under the Hammer’ and ‘Escape to the Country’ too. Whilst we can’t always commit to a rigid work routine, nor would we want to, routine really is the key to success. As you know, there aren’t unlimited hours in the day, so it’s really important to maximise them as much as possible. Use a planner and begin to establish a routine for the duration of a week. Assess your level of productivity and motivation at the end of the week. Continue to make regular adjustments where necessary. If this works for you, try to stay mindful of your routine and its benefits.

Set Realistic Goals

Whilst it’s admirable to dream big, setting unrealistic goals for yourself may lead to an indefinite level of disappointment, particularly when your motivation levels are low. Instead, look at aspects of your business that may be affecting your motivation levels, and think about how these may be improved. Use this process to set some initial goals for yourself. They may be small goals, but try to look at their combined impact when actioned.

Make a Plan of Action

Alongside each goal you’ve established, make a specific plan towards achieving each one. This should consist of manageable, easily identifiable chunks.

Focus and Commit

Set time aside to complete each goal and be sure to commit. This is going to be an ongoing process. Scheduling time for this process on a regular basis really helps, it can make you feel positively accountable.

Reward and Take Care of Yourself

Self-care is of paramount importance. Without it, you won’t be producing your best work, and your business and personal life may begin to suffer. Think about ways you can introduce self-care into your day-to-day life and start planning. It’s so important to reward yourself for your hard work. You’ll have something special to look forward to on a regular basis, which in turn may help to increase your level of motivation.

Connect with Other Creative Business Owners

Do you often feel lonely during your working day? It’s easier than ever before to connect with other small business owners, some of whom may be facing the same difficulties as you. Reach out to them and try to build a relationship. If you live nearby, you could suggest a regular catch up in a local coffee shop, or if this isn’t possible, regular Skype calls. You can use this as an opportunity to socialise, whilst also gaining a new perspective on your creative work. If your budget allows, the use of a co-working space may also help you to feel less isolated and more connected.

Remind Yourself Why

Why did you decide to start your own small creative business? How did you feel when you sold your first piece of work? You may even think back to a previous job. How did you feel on your last day, when you had this brand new journey ahead of you? For me, I chose to start my own business due to a need for more day-to-day creativity and fulfilment. Sunday blue’s became a regular occurrence and I knew I had to introduce something new into my life. Thinking back to this time helps me to renew a sense of perspective, which in turn improves my motivation levels.

IuacIQJ_

With so much distraction out there, I completely understand the affect it can have on motivation. Running your own business, although incredibly challenging, is an exhilarating experience. Demonstrating an ability to work through difficult issues faced, has the potential to improve your confidence, levels of happiness, and greater knowledge. Overcoming low motivation is challenging, but at the same time, please know that it’s entirely possible, and you’re more capable than ever before.

To all small creative business owners out there, you’ve got this!

Articles · Knitting & Crochet

How to Form a Successful Knitting and Crochet Group

Knit+and+Natter

Five years ago having recently joined the wonderful world of self-employment, I was completely and utterly delighted to be working from home in my purpose made craft room. I’d just left a full-time position at a local University, which didn’t leave a great deal of time for pursuing creative goals and dreams.

The thought of having endless hours to work creatively, tucked away in this cosy little haven, was, without a doubt, a dream come true. I was, and still of course am, incredibly grateful to have been in the position where I was able to transform my life in this way. I can wholeheartedly say that it was one of the greatest decisions I’ve ever made.

Fast forward six months later, and Felix, the ever so adorable black miniature poodle, became part of my life. He turned my world upside down in ways that I could truly never have imagined. Toilet training, shredded household items, 3am whines and interrupted face masks aside, he was, and still is, absolutely wonderful company.

Lauren Nesbitt-079

As the months passed, however, I really started to miss the level of human interaction I was once used to. After all, there’s only so many one way conversations we can have with our rather furry and ever so faithful friends. Maybe you’re thinking, ‘is there really?’ If you are, I’ll let you into a little secret. Felix and I still have our fair share of dog to human ‘conversations’, there’s no judgement here.

Canine communication aside, I excitedly scoured the web for local craft groups, specifically knitting and crochet related. To my disappointment, I wasn’t able to find one single established group in the entire area of Bath, Somerset. This was the moment I realised that I needed to create my own.

6a00d8358081ff69e201a73e0de925970d-800wi

Having absolutely no experience in running anything like this before, and possessing the classic personality traits of a strong introvert, I honestly didn’t know where on earth to start. I could have quite easily waited for another group to present itself. However, I’m so glad I took the first step towards establishing my own.

If you happen to find yourself in a similar situation, you’ve come to the best place possible, yay! Below, I’ve condensed everything I’ve learnt over the past five years into a mini-guide. So, go and make yourself an extra large cup of tea in your favourite mug, open the biscuits, and read on. I promise you’ll be a successful knitting and crochet group guru in absolutely no time.

6a00d8358081ff69e201a73e0de90f970d-800wi

Finding Members

If you have a large circle of ‘crafty’ friends, contact them. Explain that you’d like to establish a regular knitting and crochet group and name a time, date and place for it to be held on. Depending on the anticipated size of the group, your friends may wish to invite their friends, and you can continue to expand the group. If you’re not in this position, here are a few ways you can find them:

  • Sign up to meetup.com, as I did, and create your own group, which you’ll need to name. Unbeknown to me, there were many other local knitters and crocheters seeking similar groups. This website played a significant role in connecting us.
  • Create a flyer, post it in as many appropriate places you can think of.
  • Create a page on Facebook, try to attract as many relevant locals as you can. Once established, this will provide a useful space for information and can be used as one of your advertising tools.

6a00d8358081ff69e201b8d061d5d0970c-800wi

Organising Your Group

  • As above, decide the time, date, location and frequency of your group. Try to be as consistent as possible. My group runs on a fortnightly basis, it’s always held on a Thursday evening. We meet in a very well loved, independent coffee shop.
  • If you decide to use meetup.com, go ahead and create your group. Each group has its own calendar, so you can schedule regular meet ups there. Your members will be informed of upcoming meet ups and can RSVP.
  • Your first group may be very busy (as mine was), so be try to be prepared for this. Make a point of introducing yourself to as many members as possible, and create a happy, productive, welcoming environment for all. These people are crucial to the success of your group, continuously thank them for being a part of it, they’re amazing!

Screen Shot 2019-06-04 at 15.28.43

Listen To Fellow Members

Last year when my own knitting and crochet group was about to turn four, we worked on a collaborative project in celebration, which now lives permanently in the coffee shop. We shared yarn, hooks, needles, patterns and had an absolutely fabulous time creating it. New bonds were created over crochet, tea and cake, and a cushion was made for all to enjoy.  This idea originated from a much appreciated, fellow member. Without her suggestion and my acceptance, this may never have happened, so be as open as you possibly can to new suggestions.

IMG_7820

Enjoy Yourself

The main point of a knitting and crochet group is to be able to meet existing craftspeople and to share your hobbies and interests with others. Personally for me, it feels incredibly heartwarming to know that I’ve been able to connect so many local knitters and crocheters, whilst supporting a local business. If your group, like mine, continues to run for years to come, continuously remind yourself why you set it up and always make an effort to appreciate it.

Now, please go on and create your own unique group. If it’s anything like mine, it’s going to be an amazing experience. Enjoy!

6a00d8358081ff69e201a73e0dea82970d-800wi

Knitting & Crochet

Crocheting For A Cosy Autumn Evening

IMG_1532

We’re experiencing a cold snap in the UK at the moment and the evenings have been really quite chilly, brrr! I’m in the process of making a colourful granny square blanket, which is the perfect make for this time of year. However, as Halloween draws closer I really wanted to crochet some pumpkins. Luckily I was able to tuck into my yarn stash from the blanket, which will mean both makes will match beautifully once completed. Don’t you think the colours are just beautiful for this time of year?

granny1

These granny squares will eventually all be crocheted together to make the blanket you see above. I’ve been slowly working on them during the fortnightly crochet group in Bath, which I’ve been running for the past four years. They’re the perfect project to take along to a crochet group as they’re not too technically demanding (and can of course be paused for the odd bite of cake and sip of warm hot chocolate!)

granny2

granny3

The date of our last crochet group happened to mark its fourth birthday, so we decided it was the perfect opportunity to make pumpkins together. I was so happy about the prospect of crocheting pumpkins, but even more so with friends in a cosy coffee shop. I found the pumpkin pattern really enjoyable and just couldn’t stop making them. I challenge you to just make one….  I was able to stop at four pumpkins, which are now sitting very pretty on our fireplace.

IMG_30821

It’s now my plan to resume work on the beautiful sunburst granny square blanket, which you’ll find the pattern for here. Do you have any seasonal makes on your hook or needles? If so, I’d absolutely love to see them, please feel free to leave a link to your recent projects below. For all of you celebrating Halloween, have a spooktacular time and I’ll see you again soon.

Behind The Scenes · Children's Parties · Decorations · Party Shop

Personalised Children’s Party Stationery

kidstagsnew1

Hello! It’s been a good day so far today. The sun is finally shining in Somerset (after what feels like weeks of rain) and I’ve just launched a new product. I love designing stationery, particularly Children’s stationery as I feel it allows me to be extra playful with my designs. All of my designs derive from hand drawing, later to be skilfully manipulated on the computer, printed, photographed and listed on my two online shops (Etsy and Notonthehighstreet). There is only one person employed at Rosefinch Studio (good old me), meaning it can often take some time for new products to be launched.

kidstagsnew2

These ‘Personalised Children’s Party Bag Thank You Tags’ may just be one of my most favourite products yet, I just love how pretty they are. If you’re wondering what their exact purpose is, let me explain. Typically at children’s parties, theres a tradition of giving party bags to their friends as a thank you (and for transporting left over birthday cake in of course). I thought it’d be really lovely to offer personalised gift tags complete with twine for adorning such party bags.

kidstagsnew3kidstagsnew4

My party bag tags can be personalised which definitely adds a unique touch. The large number at the top of the tag represents the child’s age. There’s a sweet message underneath that (which can also be personalised), thanking their friend for celebrating their birthday party with them, followed by a ‘from’, allowing the birthday child to include their name. Each tag comes complete with twine, available in a variety of colours.

kidstagsnew5

As you can see, the tags are very floral. The hearts and polkadots look very pretty surrounding the flowers and the bird seen perching on the flower cluster finishes the design off I think. My next plan is to extend my range of gift tags as I really enjoyed designing and producing these. You just don’t seem to see anything of this kind in mainstream shops, which to me, makes it very desirable as I love unique products.

What are your thoughts? I’d love to hear from you! Do you have a party coming up? If so, happy party planning and feel free to have a browse in my Etsy and Notonthehighstreet shops for personalised party products.

Decorations · DIY Party Crafts · Party Recipes · Weddings

DIY (No Sew) Cake Bunting Tutorial

cake1cake9

Hello! In this post I’m going to show you how to make this delightful cake bunting you see here, with an easy to follow tutorial. If you have a special occasion coming up such as a birthday, wedding, christening, anniversary etc then this is perfect for you!

As you may have guessed from the above photographs, my Mother-in-law held a 60th birthday party over the weekend and I offered to bake her a cake. I was so happy when she accepted my offer, even more so when she told me she didn’t have anything specific in mind. This allowed me to have complete creative control which is perfect for me.

cake7

After spending weeks on Pinterest, I was feeling completely inspired (if not a little overwhelmed at the options) and I finally drew up a plan of what I wanted to do. As you can see from the pictures, I chose a simple vanilla layer cake with buttercream. I used a Primrose Bakery recipe from their first book, ‘Cupcakes from the Primrose Bakery’ and can thoroughly recommend all of their books for reliable recipes. I also made some vanilla biscuits from ‘The Biscuiteers, Book of Iced Biscuits’ recipe book, which I can also thoroughly recommend if like myself, you have limited experience of making biscuits.

I decided to get creative with the biscuit recipe and add a fondant topping which the Biscuiteers recipe book does not cover. I purchased a set of inexpensive letter/number biscuit stamps from Amazon alongside some complimenting sugarcraft decorations for the cake and the biscuits.

final-stepcake5

Due to the amount of detail in the cake and biscuits, I opted for some simple fabric cake bunting in complimentary colours, which I am going to show you how to make here. I have a sewing machine, but I will openly admit I am not a huge fan of sewing. If you feel the same (I hear you), then this no sew fabric cake bunting is perfect for you.

To make this DIY No Sew Cake Bunting you’ll need the following materials:

  • Fabric of your choice (I used patterned cotton from a Hobbycraft fat quarter bundle)
  • Bondaweb (This is a web adhesive on paper, usually sold by the metre – widely available online or from most craft shops)
  • An Iron and Ironing Board
  • Fabric and Paper Scissors
  • Twine or Sewing Thread
  • 2 x White Cake Pop Sticks (you can also use bamboo skewers or paper drinking straws)
  • Pencil, Ruler and Eraser
  • 1 x Piece of Paper or Card

To begin with, turn your iron on and decide which fabrics you intend on using. I opted for 7 triangles in 5 different colourways but you may decide to do this differently.

Turn your fabric onto the wrong side (the side not containing the pattern) and with your ruler and pencil, you’ll measure and mark off your first strip of fabric. Mine measured (Length) 18 centimetres x (Width) 10 centimetres. (As opposed to using a pencil, you can purchase a specific pen for drawing on fabric which allows any marks made to vanish. However, as the side we are drawing on is not visible, this isn’t necessary).

Once you’ve finished measuring your strips, take your fabric scissors and cut them out so you have something which resembles the pink piece of fabric shown below.

step1

Now the iron should be hot, take your ironing board, fold the strip in half lengthways and iron, until you have something which resembles the pink strip of fabric below. If you have multiple strips, repeat this process for all of them.

step2

Open each strip of fabric. You now need to measure and cut the bondaweb, positioning it textured side down on one side of the fold. You will need one piece of bondaweb per strip of fabric. If you have cut your fabric strips in accordance with the measurements specified above, each strip of bondaweb should measure (Length) 18 centimetres x (Width) 5 centimetres.

step3

Once the bondaweb is positioned, take your iron and iron this onto the fabric. You must ensure you have measured the bondaweb to the exact size and there are no overlaps, otherwise this may leave a sticky residue on your iron, fabric and ironing board etc which will transfer.

step4

Your strips should now resemble the ones shown in the above photograph. Take your paper scissors and cut out a triangular shape out of paper or card. This will be your template for each flag. My triangle measured 4 centimetres (at the widest part) and 4.5 centimetres in length, but they can be cut to any measurement within the size of the fabric strips.

Place the paper triangle template on your first strip of fabric and lightly draw around it. You can use a light coloured pencil to do this or a vanishing/air soluble fabric pen. Repeat the process until you have marked out all of your triangles on each strip of fabric. You can then begin cutting out your triangles which should resemble the ones shown above. (p.s the bunting is easier to assemble if the widest part of the triangle is positioned and cut on the fold of the fabric).

step6

Once you’ve cut out all of your triangles, position them into the order you’d like them to be. Take your twine or string and cut to the width you’d like your bunting to be, ensuring you’ve left approximately 10 centimetres on each side for tying the bunting on to the sticks.

Once you’ve cut your thread or twine to size, take a darning needle and thread the twine/thread through each triangle one at a time. You can easily reposition the triangles during this stage if they are a little close together, so don’t worry. Once they are positioned how you’d like them, tie each end of the bunting onto your sticks – you can just tie a small knot around the end of each cake pop stick and this will be substantial. Any excess thread/twine can be cut off. I like to have some hanging down at each end but this is personal preference.

cake3

Voila! You’re now done and you can proudly position it on your cake! I hope your cake bunting looks beautiful. I’d love to see your creation, so feel free to post it here as a comment or hit the ‘hello’ button above to send me a photograph of it via email. Happy baking/crafting!

Behind The Scenes

Crochet Star Blanket

bluestar1

If you’re a regular reader of my blog, you’ll know how much I enjoy crocheting in my spare time alongside running the party shop. I’ve recently started a new venture named Tea, Cake and Crochet, involving crochet lessons from home with the odd sweet treat… or two! (no need to worry at all though, I still absolutely adore parties so you can still visit my shop and blog for your regular party fix. I have some very exciting things planned for it this year, so please stay tuned!)

So, back to the star blanket…I’ve wanted to crochet one for a while now and some would say I am fairly late to the party. However, I’m so glad I did it. It was such an enjoyable make and it is absolutely perfect for experimenting with colour combinations. It didn’t use a lot of yarn at all, so it’s perfect for ‘stash busting.’ (in non crochet terms, using up leftover yarn which you have stashed away!)

bluestar2

Several months ago, I found out that a friend is expecting a baby boy. I decided this was the perfect opportunity to crochet a star blanket. It was a complete suprise, she did not have the slightest clue that I was crocheting it. Being such a regular social media user (particularly Instagram) it was very tempting to share my progress but I managed to resist as I didn’t want to ruin the suprise in any way! It was so worth it, as she sent me the loveliest message expressing her gratitude and sheer happiness about receiving it, which made it SO worthwhile.

bluestar3bluestar4

Now it’s been safely received, I am really happy to share the final result with you. I used the Celeste Nursery Blanket pattern, written by Lynne Rowe. You can find this in Issue 47 of Inside Crochet Magazine. This issue is not available in stores any longer as it was published in 2013, but there are ways of downloading digital back issues. I used the ‘Pocketmags’ app on my iPhone and had no trouble with it at all (other apps available).

I decided to roll the blanket up and make a bow out of some lovely blue ribbon I had in my craft room. This seemed like the nicest way to present it. I then wrapped it in some blue tissue paper and enclosed one of my ‘with love greeting cards’ from my shop. Do you like it? It feels like a job very well done to me and I couldn’t have been happier with it! Do you have any crochet projects on your hook at the moment? Feel free to comment below so I can see them, I love to see what my readers are up to!

Behind The Scenes · Uncategorized

My feature in Your Home Magazine

Several months ago I was approached by a local journalist who writes articles for a number of interior magazines. The journalist expressed a real interest in my house and asked if I would be interested in an upcoming magazine feature. At the time, it wasn’t yet decided which magazine it would be featured in (if any), but I was thrilled to later discover that ‘Your Home Magazine’ decided to run the feature in the ‘February 2017’ issue.

The journalist and photographer spent a whole day in my house once the house had been given the ‘go ahead’. Photographs were taken and a recorded interview was conducted, which would later be included in the magazine.

If you’re a regular reader, you may remember a craft room tour I gave you last June. I run the party business and blog full time from home, so it’s always been really important to me to make my surrounding space as inspiring and cosy as possible. I absolutely love prettifying my workspace and I’m constantly moving things around and adding more beautiful things to it. I treat the rest of my home very similar to this, as you may gather from the photographs, and I really do have a lot of fun with it.

craft-room3craftroom10craft-room4

Felix and Mabel took centre stage on one of the magazine photographs, so they are now famous, probably being admired by many… *giggles..* Blossom (our red miniature poodle, pictured left) was not living with us at the time, so she wasn’t included in the photo shoot. She’s not one to miss out though, so here she is pictured below, reading the article whilst Felix takes a long, lazy afternoon nap!

blog781craftroom8

Mabel (pictured above) is certainly not one to miss out on a blog feature, so here she is posing in my craft room for you.

It really did mean a lot to be featured in the interiors magazine. Our experience of buying a new build house really wasn’t the best, and at times, I am happy to openly admit that it has been very testing. As first time buyers, our budget has been stretched which won’t come as a great suprise to anybody, so I feel we’ve had to work just that extra little bit harder to fill and decorate our four bedroom house.

In someways, this has worked out absolutely perfectly, as the house has had a lot personality and charm injected into it – something which can sometimes be more of a challenge to achieve when the house has been decorated out of a catalogue. I definitely have nothing against that way of decorating, but for somebody like myself who loves handmade touches – it couldn’t have worked out better.

After living in the house for what is coming up to two years this year, inevitably there are a few more things we would like to do to the house. This to me is quite comforting as I love a good ‘work in progress’ and it means everything can be well considered.

I have some really exciting things planned for my shop this year, particularly in terms of my stationery range, and I genuinely feel like it’s going to be the best year yet for my business. I hope you’ll stay with me to see where the year takes me! All the very best for 2017 and thank you for reading!

DIY Party Crafts

Gingerbread Village Decorating

We had family visiting this Christmas and I decided to choose a variety of fun, creative tasks for us to share on the kitchen table on Christmas Eve. Alongside some mince pie baking and puzzle making, I bought a ‘Create A Treat’ gingerbread village decorating kit. This was so enjoyable and I was so pleased with the results, I just couldn’t wait to share the finished village with you!

house1house2

The kit came complete with everything needed to assemble and decorate all of the (five) mini buildings within the gingerbread village. The gingerbread pieces were all flat packaged and were all carefully snapped into individual building pieces, later to be assembled with the use of the (rather yummy) icing. There was more than enough icing and plenty of very tasty sweeties…. (some of which didn’t quite make it onto the house, of course). The sweeties (Canadian) consisted of Jelly Hearts, Pucker Ups, Multicoloured Mini Beads and Jelly Beans… How yummy?!

house4house5house7

Above, you will see a ‘Toy Shop’, ‘Chalet’, ‘Regular House’, ‘Gabled House’ and a ‘Building’ all lovingly assembled and decorated by myself and my lovely family on Christmas Eve. I think I’ve started a new Christmas Eve tradition and I hope to do the same next year with a different kit. Do you have any similar Christmas Eve traditions? Did you manage to do any Christmas Eve crafting? I’d love to know and I really hope you’ve enjoyed seeing our village. If only all villages were as sweet at this one!